

Project Description
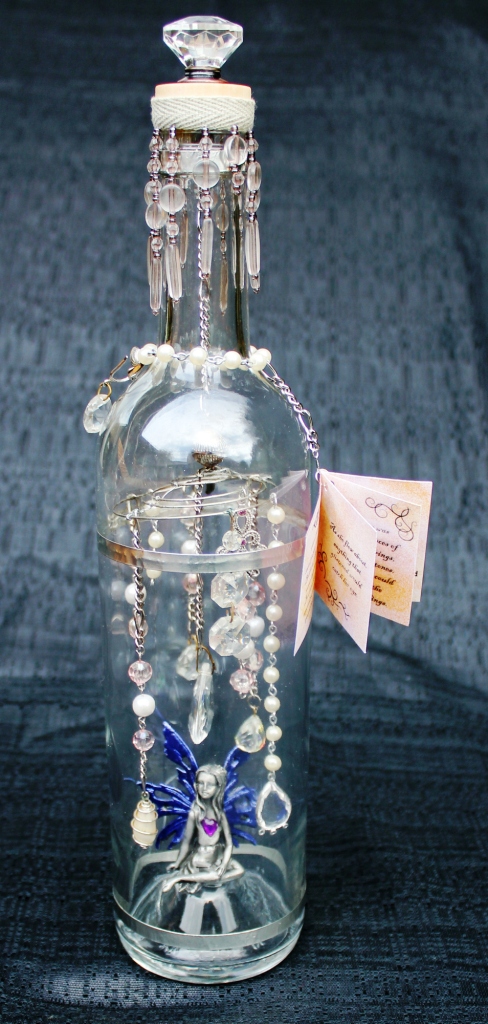
Brillare – a Pixie surrounded by shiny things – in her bottle.
Welcome  to the Upcycle Blog Hop hosted by Tanya, the Scrappy Scavenger. If you’re doing the hop and are here from Dawn’s blog, Strawberry Delights, then you are in the right spot. If you just arrived here and would like to start from the beginning of the hop, please go to Tanya’s blog, the Scrappy Scavenger.
For this hop, Tanya asked us to create something by re-purposing materials. In other words, use something in a way that’s different than its original purpose.

A close-up of Brillare, surrounded by eye glass chains, earrings and gems.
I decided to re-purpose things I’ve picked up at thrift stores and yard sales, including finds from Swapper’s Day (e.g., a spiral Christmas ornament, mis-matched earrings, eye glass chains, crystals, a key & beaded fringe), a wine bottle and the wooden base from a mannequin I used for my letterblock tray project. The main element of the project is a small fairy or pixie, only 2.5″ wide and 2.5″ tall! I came across 6 of these and knew I wanted to use one in a project like this. If she catches your eye, I put the remaining ones up for sale in our Ephemera & Found Objects shop.
The most difficult part of the project was taking apart the small links in the chains I found so I could re-assemble them to make the streams of beads that surround the pixie. It was also a little tricky to take the Christmas ornament, cut it in half, flatten it, and suspend the streams from it so it was balanced.
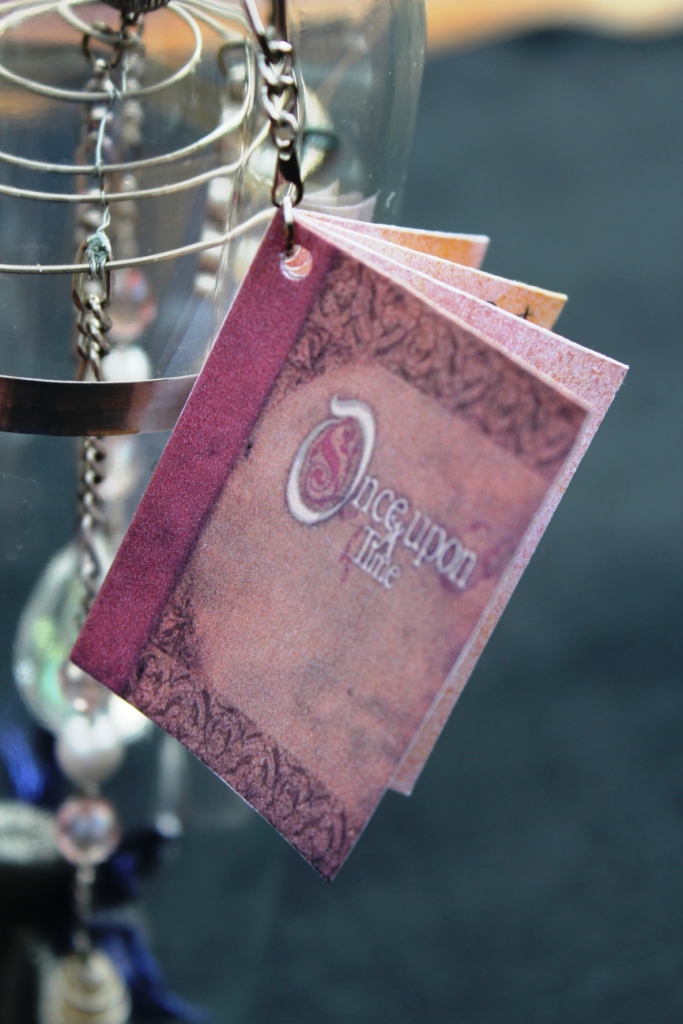
A small book (about 1″ x 1.5″) tells the story of Brillare – the pixie that loves to collect things that sparkle.
Everything is glued in placed using Glossy Accents. I even used it to glue the bottle back together. I covered the seam with silver foil tape.
To finish off the piece, I create a mini book, that tells the story of Brillare – a pixie that loves anything that sparkles. She mischievously goes around and picks up anything shiny – as long as it’s small enough for her to carry – and takes it back to her home.
There are more pictures at the bottom of this post so you can see the process of creating the bottle. But, let’s get to the blog candy!!
I am so excited to be launching the newest part of our site, a growing online Shop, during this hop, I wanted our blog candy to be extra special. So, on Monday, 9/19 at midnight EST I’ll pick a winner at random who will be receiving our Your Story package. The winner will be able to create personalized books, albums and journals with ease! Your Story is a thermal book binder with unmatched versatility and is perfect for creating unique gifts, memory books, and a host of paper crafting projects. Our package prize includes the following:
| 12″ YourStory book binder / laminator machine 12 – 9″ x 11.5″ Laminating Pouch 3mil 12 – 4.5″ x 6.5″ Laminating Pouch 3mil 1 – Paper Trimmer 1 – 8.5″ x 11″ Binder-Black Leather Texture Portrait no window 1 – 8″ x 8″ Binder-White Linen Texture w/window 1 – 4″ x 6″ Binder-Black Linen Texture no window 1 – 8.5″ x 11″ Binder-Brown Leather Texture Landscape no window 1 – 12″ x 12″ Binder-Black Leather Texture no window 1 – User Manual |  Your Story Package Prize Giveaway |
Since our blog is still relatively new, we need followers. We promise to post interesting articles, product reviews, project ideas, and tool tips. So, to enter this giveaway please do the following as many of these 4 things as you can by 11:59PM EST Monday, 9/19:
- Join Our Site or Follow us, please
- Post a link to www.createNcraft.com on your blog, Twitter, Facebook or Google+ (you can use the buttons at the bottom of this post).
- Tell someone about our giveaway and encourage them to enter too!
- Leave a comment on this blog post and tell us where you posted our link and how you spread the word about the giveaway.
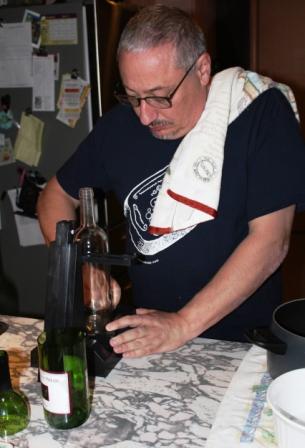 Preparing to cut a clear bottle. The green bottle was a “practice run.” I’m in the kitchen, and I’m Italian, so I have a “mopina” over my shoulder. No reason why…it’s genetic I guess! LOL! | 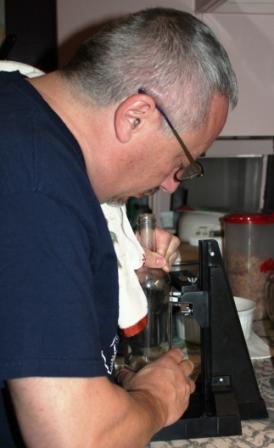 Scoring a clear bottle. The first step of the cutting process. | 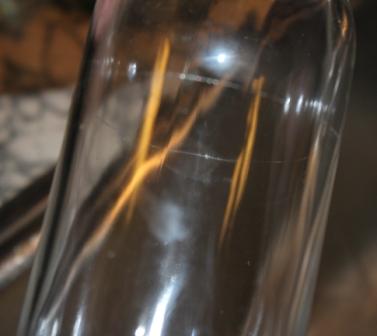 A clean score line is important for a clean cut. Never go over the line more than once, never start another line. |
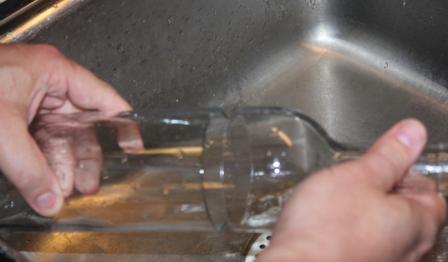 If you want a really clean cut, drizzle boiling water over the score line, then drizzle cold tap water. Using a hammer to tap the line to separate the bottle is unlikely to yield a clean cut. | 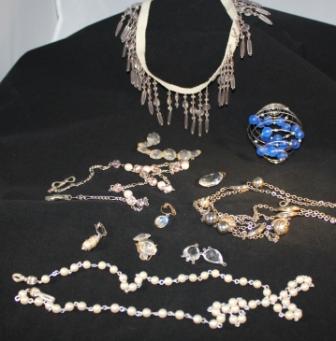 Recent finds at a flea market were perfect for the project; a spiral Christmas tree ornament, a few odd earrings, a necklace and two eyeglass chains. | 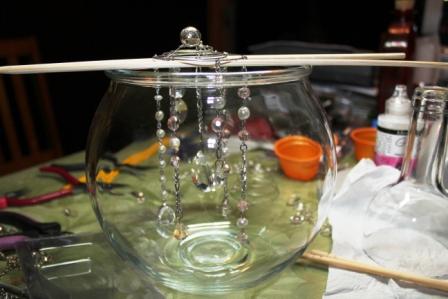 The bling chains attached to the half of the spiral ornament, glued in place with Glossy Accents, drying. |
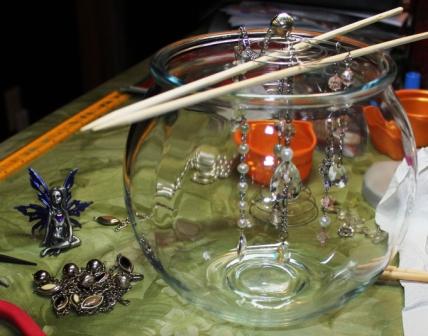 Using chopsticks to hold the spiral and chains in place to dry was a great suggestion by Joe Morgan. | 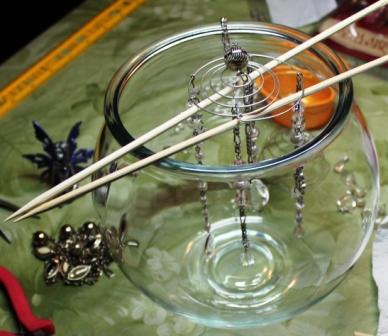 The Christmas tree ornament was the perfect framework for hanging the chains, after it was cut in half and the blue beads were removed. | 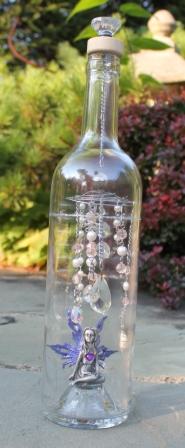 The interior of the bottle is complete – the pixie is in place, the chains are hanging and the top’s closed with a wooden disc and door knob. |
Joe that is amazing!!!! And I mean amazing. I absolutely love it. You are the bomb!
Joe!
This is wonderful. The fairy jar would make a little girl very happy. Such talent you have! Amazing how you tied all the differing pieces together to make this beautiful object.
So nice to hop host with you and to "meet" you.
(don;t enter me in the drawing)
Awesome Joe! I love the Pixie in a Bottle… I can hear Christina Aguilera singing now… ;0) I've posted this on my FB! http://facebook.com/jamie.crowe
Joe, you have out done yourself! This is too cool. Can't wait for you to see and use a 1" printers tray…te he he…..Great pixie in a bottle!!! Love it and love you! K
oh yeah..shared you on FB!!
Wow, Joe! You really outdid yourself. Very pretty!
This is amazing. I love the idea. I love collecting items from here and there and now I have another idea of what to do with them…Fabulous.
Thanks for showing all the steps.
It's been great hopping with you.
Hugs
Brenda
I would be honored if you came to see my blog here
LOVED IT!!
Wow, so very cool. Love the bottle with the fairy in it. Cute!
LOVE it!!! You are design is amazing—-Now I want one!!!!
Hug-
V
absolutely gorgeous.
hey hi
I generally dun see male having so much love towards crafts .. m so happy to see your work ..
i m now ur new follower .. i will be sending two friends here .. but they dont own a blog .. i apologize , Also i have added this link to my sidebar
Please come and visit me sometime .. i would love to see your work .. even if i dun win this candy
Hugs
Mallika
http://missnotsogoodwithwords.blogspot.com/
Joe!
What a wonderful project and the storybook just makes it extra special! Your thoughtfulness and technique in putting the design together intriguing and inspiring!
Thank you for sharing!
Debra
i had written this really long comment before .. wonder where it has gone
well .. as i said .. its strange to find a male interested in crafts .. i would love to follow you
i will b sending few friends here too ..
hope you will like it
plz visit me sometime too
regards
mallika
http://missnotsogoodwithwords.blogspot.com/
mallikakejriwal@gmail.com
hey hi ..
such a great giveaway ..
lovely project .. it looks to intricate
I was send here by my friend Mallika
Regards
Bandariya !
I have followed you too
Breath taking! What an amazing piece you have created! Thank you so much for your kind giveaway! Im sure it will make someones day! Thanks for participating in my hop, I have had a great time creating with you all!!!
Incredible! This is a wonderful piece of art! I have got to hook up with you… Too close not to make the trek!
Janice
http://www.cricutconfessions.com
This is really pretty! You did a great job on this! I shared on my FB and told lots of people about it. Yes, I know am not eligible for the C&C prize. 😉
Joe, you are truly amazing, the talent you have is fab!! It was great to meet you today. Love the blog!
Wow! I really like your style, Joe! 🙂 I love the bottle and eensy teensy book! I am going to follow you.
I was so excited to get a moment of Internet to check out your newest creation! You are so amazingly talented! I'm not sure what I enjoy the most – your finished project or your process. I love how your mind works! Can't wait to see it in person. I'm sure it's even more breathe taking. What's next?!
The bottle is gorgeous! Love the little book and the story too! I know I am not eligible for our giveaway either! 😉
I joined your site and shared your project on FB and twitter – great job, Joe!
I am following your blog, I tweeted and I told my friends – I just called them! this was something I had to tell them!
kacee
What a wonderful project. The bottle is gorgeous. I've told people about your blog and I joined via GFC. Thanks for a chance to win.
Babe
youiesmom@att.net
I love your project. Amazing job. I posted about this site on my blog and became a follower:)
Gorgeous bottle !!!
Wow… I love these…. love the fair one alot…
Outstanding–as always. You're projects are amazing and inspirational. Love the whole story of Brillare.
OH MY GOSH this is precious!!!! I just love it. There is a lot of work in this project~!!!! TFS
I joined the site & posted on FB
Simply lovely creativity on your repurposed creation! I simply adore finding art in discarded items! Love your creative style! I am already a follower of your delightful blog! And what an AMAZINGLY generous giveaway you have going on. Will be keeping my fingers crossed!!
so fun Joe! love the whimsy of it!
lovely art….just loved it…
Joe, thank you so much for sharing this exquisite piece of art work with us today at Red Letter Journals. To be able to hold this piece and really see the intricate details was inspiring!!! I can't wait to do the class. :0)
It was GREAT meeting you at RLJ yesterday! I'm so glad we had the chance to chat and I look forward to creating with you in the future!
What a great inspiration. Thanks for kick starting my mojo!!
I received this AMAZING prize in the mail on Saturday … thank you again, Joe, for sponsoring this GENEROUS giveaway event!
http://lillianchild.blogspot.com/2011/10/what-pri…